YumaPro Docker User Guide
YumaPro Docker images package the YumaPro SDK inside an Ubuntu container for quick evaluation and lab use. These images are not intended for production deployments.
Warning
YumaPro Docker images are for quick starts and demos only. Any changes made while a container is running will be lost when it exits unless a new image is committed.
Download YumaPro SDK Eval Docker
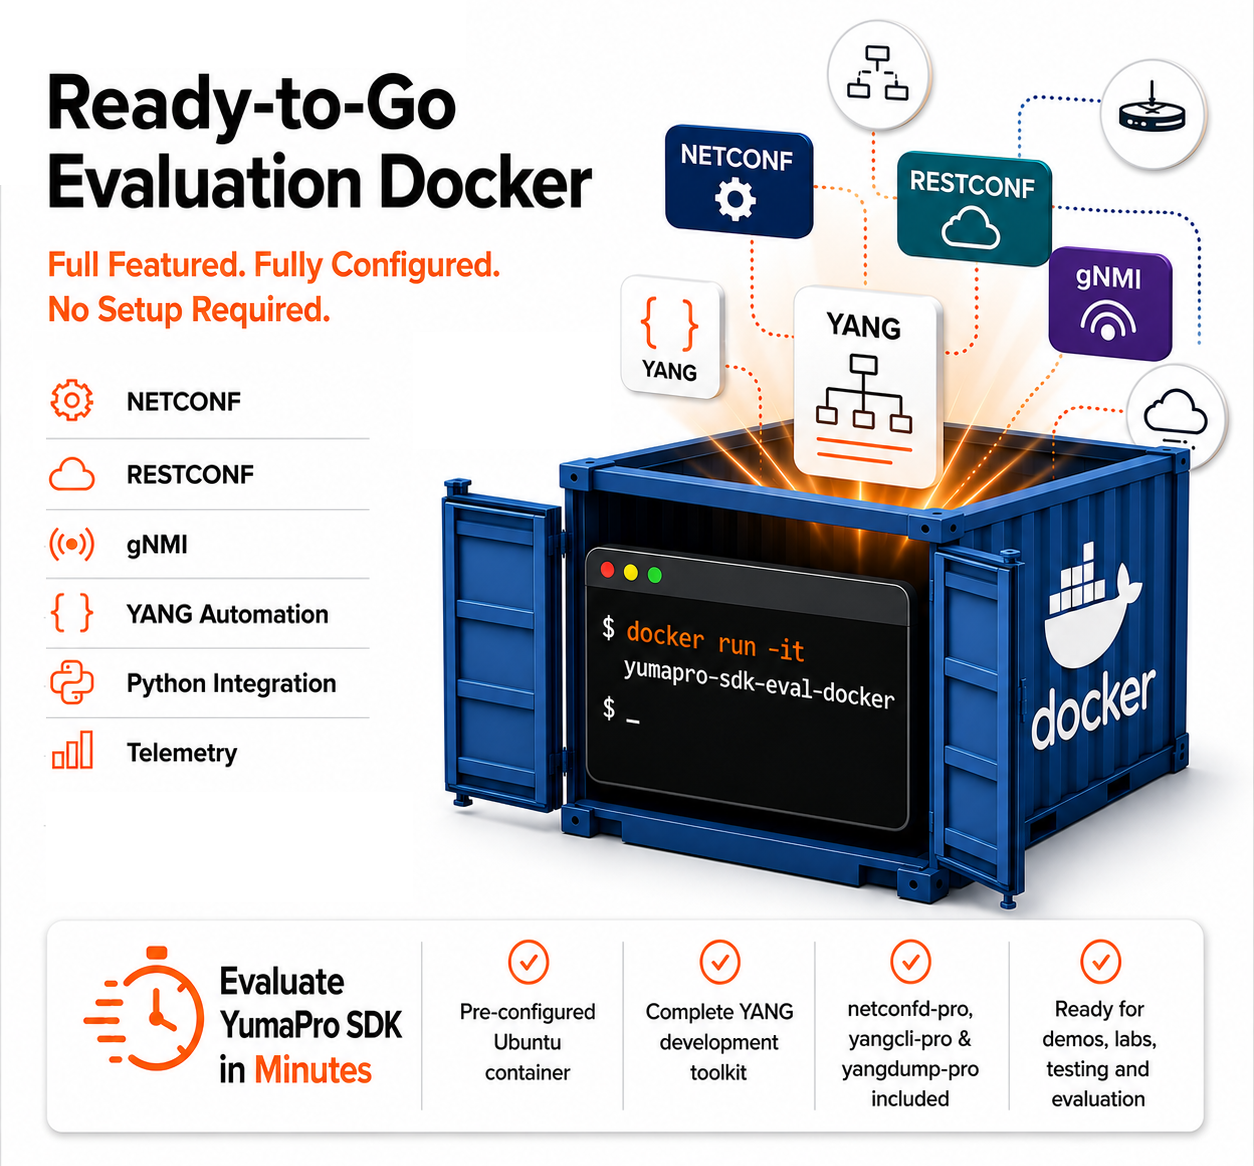
YumaPro SDK Eval Docker provides a full Software Development Kit for developing and testing YANG models. It includes:
netconfd-pro: a professional-grade server that provides NETCONF, RESTCONF, and Call Home protocols along with TLS and SSH support. It has multiple datastore capabilities, is NETCONF v1.0 and v1.1, as well as YANG v1.0 and v1.1 compliant.
yangcli-pro: a CLI-based client that can connect to multiple NETCONF and RESTCONF servers. It features automatic edit testing on specified objects, customized command line behavior, validation of YANG content, and NETCONF notification support.
yangdump-pro: a YANG compiler for automatic code generation from YANG modules, either standards-based or custom modules. All other YumaPro SDK development tools are also included.
Download the YumaPro SDK Eval Docker image from YumaWorks' website. Unzip the yumapro-sdk-eval-docker.zip file and use the yumapro-sdk-eval-docker.tar file as the Docker image file.
YumaPro SDK Eval Docker images are provided for research and evaluation purposes. Contact YumaWorks today to inquire about licensing.
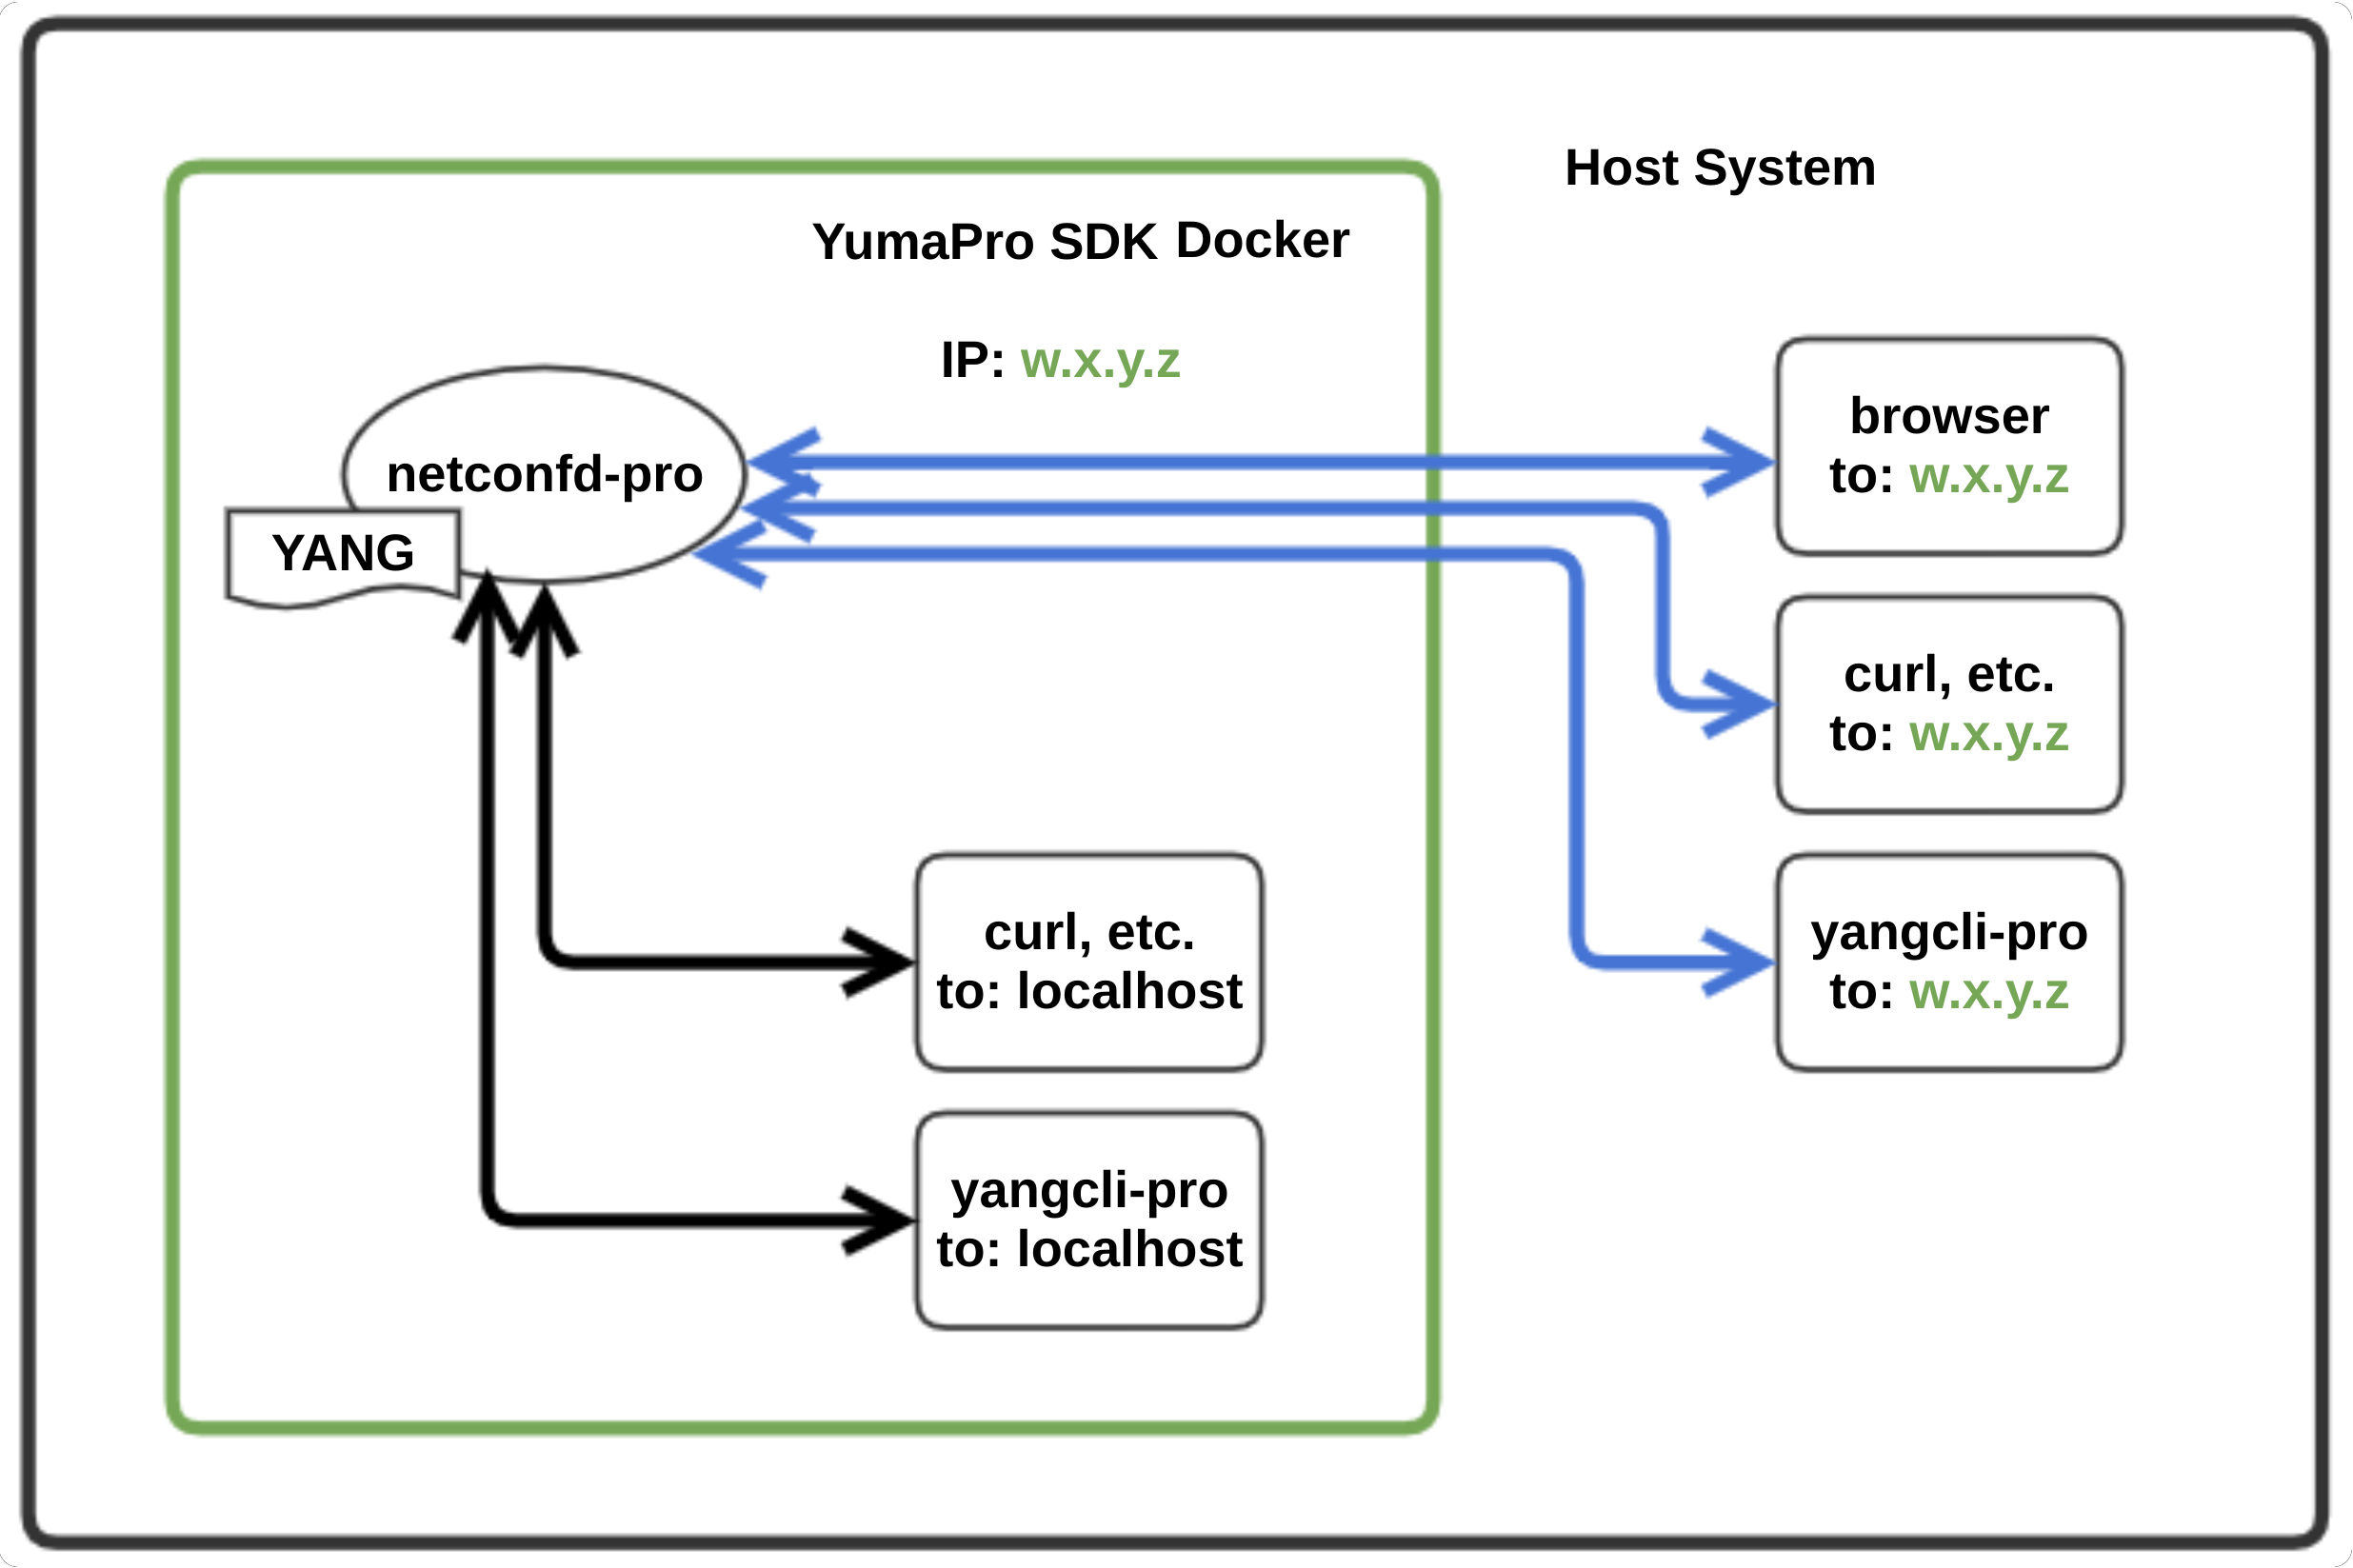
Diagram of YumaPro SDK Docker in a Host System
Prerequisites for Using YumaPro Docker
Installation of the Docker environment is required on the host system. The links below provide Docker installation instructions for common platforms:
Linux - Install Docker Engine on Ubuntu (guides for other Linux systems are also available)
Windows - Install Docker Desktop on Windows
macOS - Install Docker Desktop on Mac
Loading the YumaPro Docker Image
Once the image is downloaded, unzipped, and placed in your desired location, load it from the directory where it resides:
sudo docker load -i yumapro-sdk-eval-docker.tar
Example output:
Loading layer [==================================================>] ...
Loaded image: yumapro-sdk-eval-docker:latest
How to Use YumaPro Docker
Once Docker completes its load operation of the YumaPro SDK Eval Docker image, start the Docker container using the command shown below. The output will look similar to this:
sudo docker run -it yumapro-sdk-eval-docker
Example output:
 * Restarting Apache httpd web server apache2                   [ OK ]

Starting netconfd-pro...
Copyright (c) 2008-2012, Andy Bierman, All Rights Reserved.
Copyright (c) 2012-2026, YumaWorks, Inc., All Rights Reserved.

netconfd-pro version 25.10-6-EVAL-13fcf (25.6.0)

To run a command as administrator (user "root"), use "sudo <command>".
See "man sudo_root" for details.

docker@7a1a1cee2e8c:~$
SSH and Apache2 start automatically. The container prints the netconfd-pro version on startup, but the netconfd-pro server is not started automatically. Start it in the background with sudo -b (password 'changeme'). Use parameters such as:
--fileloc-fhs='true'
--log-level='debug4'
--log='/home/docker/netconfd-docker.log'
--access-control='off'
--with-yuma-system='true'
sudo -b netconfd-pro \
  --fileloc-fhs=true \
  --log-level=debug4 \
  --log=/home/docker/netconfd-docker.log \
  --access-control=off \
  --with-yuma-system=true
To use --config instead of CLI parameters, create
/etc/yumapro/netconfd-pro.conf or copy the sample and edit it:
sudo cp /etc/yumapro/netconfd-pro-sample.conf /etc/yumapro/netconfd-pro.conf
sudo nano /etc/yumapro/netconfd-pro.conf
Verify the server is running:
pgrep -fl netconfd-pro
Or check the log for a successful start:
tail -n 20 /home/docker/netconfd-docker.log
Expected latest lines (no errors):
Running netconfd-pro server <VERSION>
Binding to AF_LOCAL socket /var/run/netconfd-pro/ncxserver.sock
agt_ncxserver: listen ncxsock fd: 5
For more details and examples on how to use netconfd-pro, refer to the YumaPro netconfd-pro Manual.
Warning
YumaPro Docker images, like any other Docker images, are a snapshot of a running system. Any changes made while the Docker is running, whether adding applications, files, or configuration changes, will be lost if the Docker is exited. To retain changes, see the section below: Clone the YumaPro Docker.
First Test with yangcli-pro
For the first test, run yangcli-pro, the YANG-based CLI client, to verify the netconfd-pro server is running and reachable. Connect to the server and display some data using the sget command.
Command:
yangcli-pro
Example output:
  yangcli-pro version <VERSION>
  libssh2 version 1.10.0

  Copyright (c) 2008-2012, Andy Bierman, All Rights Reserved.
  Copyright (c) 2012-20XX, YumaWorks, Inc., All Rights Reserved.

  Online user manual:
  https://docs.yumaworks.com/en/latest/yangcli/index.html

  Type 'help' or 'help <command-name>' to get started
  Use the <tab> key for command and value completion
  Use the <enter> key to accept the default value in brackets

  These escape sequences are available when filling parameter values:

      ?       help
      ??      full help
      ?s      skip current parameter
      ?se     skip rest of optional parameters
      ?c      cancel current command

  These assignment statements are available when entering commands:

      $<varname> = <expr>     Local user variable assignment
      $$<varname> = <expr>    Global user variable assignment
      @<filespec> = <expr>    File assignment

>
Connect to the server (use the configured user/password) in the yangcli-pro terminal:
connect server=localhost user=docker password=changeme
Example session snippet (prompt shows 'user@server> ' when connected):
NETCONF 1.1 session established for docker on localhost

Client Session Id: 11
Server Session Id: 4

... [capabilities and modules list] ...

docker@localhost>
Once connected (prompt shows 'user@server> '), show NETCONF streams:
sget /netconf
Output:
RPC Data Reply 2 for session 4 [default]:

rpc-reply {
  data {
    netconf {
      streams {
        stream  NETCONF {
          name NETCONF
          description 'default NETCONF event stream'
          replaySupport true
          replayLogCreationTime 2025-12-19T22:42:52.704541Z
        }
      }
    }
  }
}
Load the standard ietf-interfaces module for the server, copy it for the client, and query interface data. When the server starts with --with-yuma-system, load matches multiple commands; use 'ysys:load' (yumaworks-system) instead of 'ypsys:load' (from yuma-system).
Commands:
ysys:load ietf-interfaces
mgrload ietf-interfaces
sget /interfaces
Example output:
RPC Data Reply 2 for session 3 [default]:

rpc-reply {
  mod-revision 2018-02-20
}

Module 'ietf-interfaces' revision '2018-02-20' already loaded

RPC Data Reply 4 for session 3 [default]:

rpc-reply {
  data {
    interfaces {
      interface  lo {
        name lo
        description lo
        enabled true
        oper-status down
        phys-address 00:00:00:00:00:00
        statistics {
          in-octets 85732
          in-multicast-pkts 0
          in-discards 0
          in-errors 0
          in-unknown-protos 0
          out-octets 85732
          out-discards 0
          out-errors 0
        }
      }
      interface  eth0 {
        name eth0
        description eth0
        enabled true
        oper-status up
        phys-address f2:a8:39:b3:c8:2e
        speed 10000000000
        statistics {
          in-octets 127626
          in-multicast-pkts 0
          in-discards 0
          in-errors 0
          in-unknown-protos 0
          out-octets 126
          out-discards 0
          out-errors 0
        }
      }
    }
  }
}
Repeating 'sget /interfaces' shows interface statistics changing. Depending on interface usage, more than one repeat may be needed to see a change. For a full working example, see IETF-Interfaces Example: YANG Module and SIL.
For more details and examples on using 'yangcli-pro', see the YumaPro yangcli-pro Manual.
RESTCONF on Docker
Next, use quit to exit yangcli-pro:
quit
Use the 'curl' command-line tool to access the same ietf-interfaces data using RESTCONF:
curl http://localhost/restconf/data/interfaces
Output:
{
 "ietf-interfaces:interfaces": {
  "interface": [
   {
    "name":"lo",
    "description":"lo",
    "enabled":true,
    "oper-status":"down",
    "phys-address":"00:00:00:00:00:00",
    "statistics": {
     "in-octets":"188753",
     "in-multicast-pkts":"0",
     "in-discards":0,
     "in-errors":0,
     "in-unknown-protos":0,
     "out-octets":"188753",
     "out-discards":0,
     "out-errors":0
    }
   },
   {
    "name":"eth0",
    "description":"eth0",
    "enabled":true,
    "oper-status":"up",
    "phys-address":"f2:a8:39:b3:c8:2e",
    "speed":"10000000000",
    "statistics": {
     "in-octets":"131665",
     "in-multicast-pkts":"0",
     "in-discards":0,
     "in-errors":0,
     "in-unknown-protos":0,
     "out-octets":"11090",
     "out-discards":0,
     "out-errors":0
    }
   }
  ]
 }
}
Repeating the curl command shows the interface counts changing.
Access the Server from the Host
Find the IP address assigned to the Docker container with the 'ifconfig' command:
ifconfig
Example output:
eth0: flags=4163<UP,BROADCAST,RUNNING,MULTICAST>  mtu 1500
        inet 172.17.0.2  netmask 255.255.0.0  broadcast 172.17.255.255
        ...

lo: flags=73<UP,LOOPBACK,RUNNING>  mtu 65536
        inet 127.0.0.1  netmask 255.0.0.0
        ...
The container IP address in this instance is 172.17.0.2, as shown by the 'eth0' inet value.
Note
Each time the container restarts the IP address may change.
In a different terminal on the host (outside the Docker container), use 'curl' to access the same data:
curl http://172.17.0.2/restconf/data/interfaces
Output:
{
 "ietf-interfaces:interfaces": {
  "interface": [
   {
    "name":"lo",
    "description":"lo",
    "enabled":true,
    "oper-status":"down",
    "phys-address":"00:00:00:00:00:00",
    "statistics": {
     "in-octets":"190131",
     "in-multicast-pkts":"0",
     "in-discards":0,
     "in-errors":0,
     "in-unknown-protos":0,
     "out-octets":"190131",
     "out-discards":0,
     "out-errors":0
    }
   },
   {
    "name":"eth0",
    "description":"eth0",
    "enabled":true,
    "oper-status":"up",
    "phys-address":"f2:a8:39:b3:c8:2e",
    "speed":"10000000000",
    "statistics": {
     "in-octets":"133026",
     "in-multicast-pkts":"0",
     "in-discards":0,
     "in-errors":0,
     "in-unknown-protos":0,
     "out-octets":"11644",
     "out-discards":0,
     "out-errors":0
    }
   }
  ]
 }
}
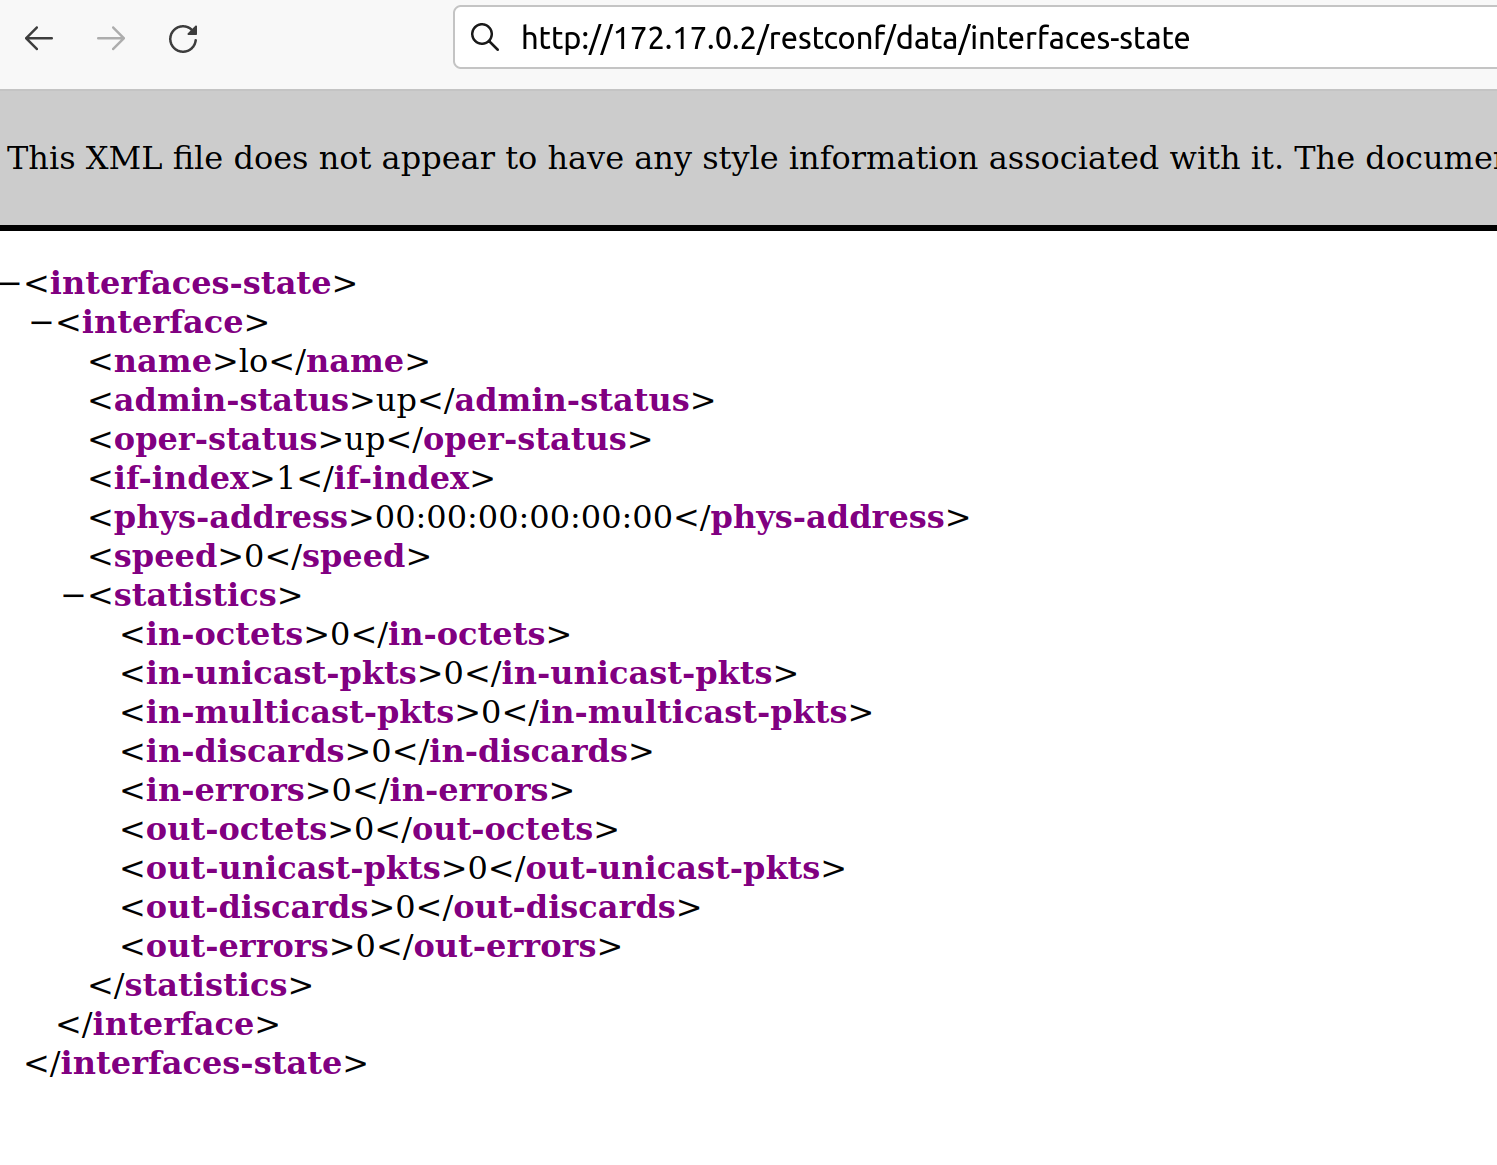
The same URL, http://172.17.0.2/restconf/data/interfaces, can also be used in a browser on the host system:
Note
YumaPro Dockers are only accessible, with ssh, ping, etc., from their host machine.
For more details and examples, refer to Using RESTCONF.
YP-WEB UI on Docker
YP-WEB provides a browser-based UI for working with NETCONF via a yangcli-gw backend.
Make sure netconfd-pro is running (see the earlier section in this guide).
Start yangcli-gw in the container (leave it running):
yangcli-gw
Example output:
yangcli-gw version <VERSION>
libssh2 version <VERSION>

Copyright (c) 2008-2012, Andy Bierman, All Rights Reserved.
Copyright (c) 2012-20XX, YumaWorks, Inc., All Rights Reserved.

zmqapi: Bind to responder endpoint OK 'tcp://127.0.0.1:5555'
zmqapi: Bind to publisher endpoint OK 'tcp://127.0.0.1:5556'
Start yp-web-core in another terminal:
In a second terminal on the host machine, start a new shell in the running container (the example uses container name 'yumapro-sdk'):
sudo docker exec -it -u docker yumapro-sdk bash
Then start yp-web-core:
yp-web-core
Example output:
<TIMESTAMP> - INFO - Starting application
<TIMESTAMP> - INFO - WEBSOCKET: ** Starting WebSocket server 0.0.0.0:8123
<TIMESTAMP> - INFO - WEBSOCKET: ** server listening on 0.0.0.0:8123
Open the UI in a browser (use the container IP address from the previous section):
http://<container_ip>:8080/ (example: http://172.17.0.2:8080/)
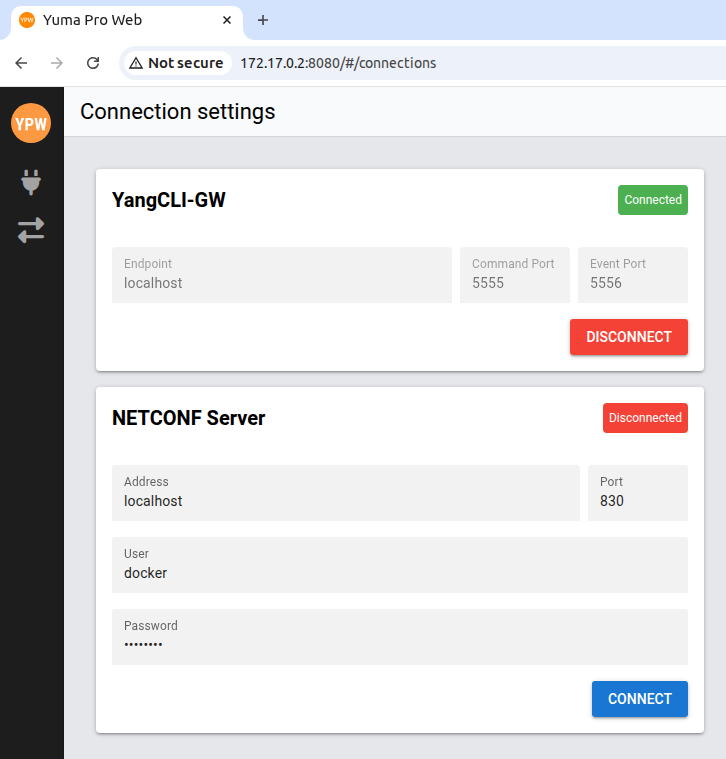
In the Connection settings page:
YangCLI-GW: Endpoint 'localhost', Command Port '5555', Event Port '5556' (should connect automatically and show 'Connected')
NETCONF Server: Address 'localhost', Port '830', User 'docker', Password 'changeme' (enter password, then click Connect)
Example (Connection settings):
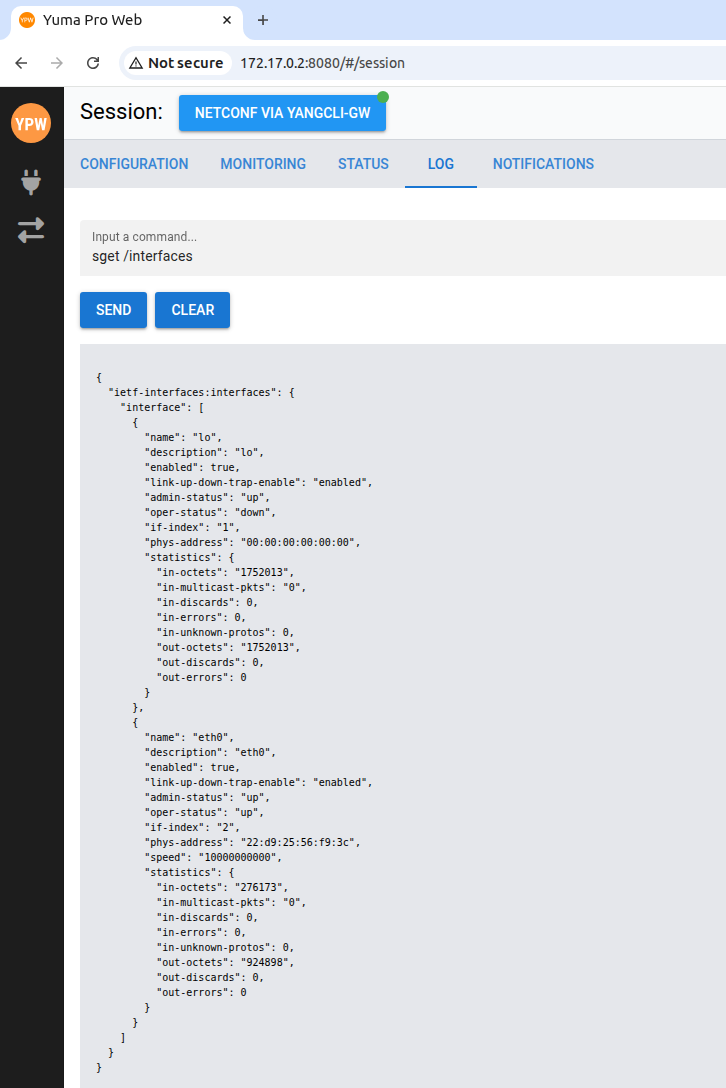
Open the LOG tab, enter 'sget /interfaces', and click Send.
Example (LOG tab):
To stop yp-web-core or yangcli-gw, press Ctrl+C in the terminal running it.
For more details, refer to the YP-WEB User Manual.
Cloning the YumaPro Docker to Save Changes
When working with YumaPro Dockers changes can be made to the Docker image, such as changing the existing user, adding different users, modifying permissions, and adding or creating files on the container filesystem.
To preserve these changes for the next time the YumaPro Docker starts, clone the current system to a new Docker image using the Docker 'commit' command.
Note
It is important to stop the netconfd-pro server before cloning the image. If this is not done the clone snapshot will try restarting the server and fail as the PID file used by the server is already in use. This may also apply to other applications installed that are running at the time the snapshot is taken.
To stop netconfd-pro (running with --with-yuma-system='true'), connect to yangcli-pro and run:
yangcli-pro server=localhost user=docker password=changeme
shutdown
quit
To commit the changes made inside a Docker container, use the steps below (all commands run on the host):
Note
The new container can run at the same time as the original. The two will have different IP addresses.
Example:
Step 1: find the container ID.
Tip: the container shell prompt shows user@container-id (for example, docker@7a1a1cee2e8c), which should match the ID from 'docker ps -a'.
sudo docker ps -a
Output:
CONTAINER ID   IMAGE                    STATUS      PORTS
7a1a1cee2e8c   yumapro-sdk-eval-docker   Up 3 days   22,830,8080/tcp
Step 2: commit the container.
sudo docker commit 7a1a1cee2e8c yumapro-sdk-eval-docker2
Output:
sha256:8ab571e9002397284bddadab26c3f6dd2c8a16c58eaf17839741e6d26432ab42
Step 3: list images.
sudo docker image ls
Output:
REPOSITORY                TAG       IMAGE ID       CREATED          SIZE
yumapro-sdk-eval-docker2  latest    8ab571e90023   34 seconds ago   949MB
yumapro-sdk-eval-docker   latest    12a66fe42da1   3 days ago       948MB
Step 4: run the new image.
sudo docker run -it yumapro-sdk-eval-docker2
Output:
 * Restarting Apache httpd web server apache2                   [ OK ]

Starting netconfd-pro...
Copyright (c) 2008-2012, Andy Bierman, All Rights Reserved.
Copyright (c) 2012-20XX, YumaWorks, Inc., All Rights Reserved.

netconfd-pro version <VERSION>
docker@7b68dba27f21:~$
Note
As the netconfd-pro server was stopped before making the clone the ietf-interfaces module will need to be reloaded into the server and the client. If specific YANG modules should be automatically loaded or other parameters configured each time the server restarts, modify the server configuration file - /etc/yumapro/netconfd-pro.conf.
There are many CLI parameters for the server which can be found documented here: YumaPro CLI Reference
Further Reading
Location of YumaPro SDK files and binaries (the YumaPro SDK Eval image may not include all SDK components): Appendix: Installed Files
YumaPro development tutorial: Server Developer Getting Started
YumaPro SDK Eval support: Submit a Ticket
Building YumaPro Docker images: YumaPro Docker Developer Guide