YumaBench Installation Guide

Install YumaBench on a supported Linux, macOS, or Windows system. This guide walks you from download through first launch.
Note
Your computer must have Internet access during installation. You also need
sudo or administrator permission. If you do not have that permission,
ask your system administrator to install YumaBench.
Choose Your Platform
Platform |
Supported versions |
Installer |
|---|---|---|
Linux |
Ubuntu 22.04/24.04 LTS; Debian 12 |
|
Linux |
Fedora 39/40/41; CentOS Stream 9; Red Hat Enterprise Linux 9 |
|
macOS |
Sonoma; Apple silicon |
|
Windows |
Windows 10 or 11, 64-bit |
|
Download YumaBench
The latest YumaBench software can be obtained from the YumaWorks Developer Portal.
Select the file you need and download it to your computer.
Install on Linux
Download the installer that matches your Linux distribution, open a terminal in the download directory, and follow these steps.
Install the Linux Package
Package type |
Command |
|---|---|
Debian/Ubuntu ( |
|
Fedora/CentOS/RHEL ( |
|
When prompted to install dependent packages, type y and press Enter.
Enable EPEL When Required
On CentOS or Red Hat Enterprise Linux, the installer may report that packages
are unavailable. Enable the EPEL repository, then repeat the dnf install
command.
For CentOS Stream 9:
$ sudo dnf config-manager --set-enabled crb
$ sudo dnf install epel-release epel-next-release
For Red Hat Enterprise Linux 9:
$ sudo subscription-manager repos --enable codeready-builder-for-rhel-9-$(arch)-rpms
$ sudo dnf install -y https://dl.fedoraproject.org/pub/epel/epel-release-latest-9.noarch.rpm
Run the Linux Installer
After the package installation finishes, start the graphical installer:
$ yumabench-linux-installer
On the Introduction screen, select Next.
Accept the license agreement and select Next.
On the Ready to Install screen, select Next.
Enter your
sudopassword when prompted.
Launch YumaBench from the application menu, or run:
$ yuma-bench
Install on macOS
These instructions apply to macOS Sonoma on Apple silicon Macs.
Move the Installer to Applications
Download
yuma-bench-installer.dmg.zip.In Finder, open Downloads and expand the archive.
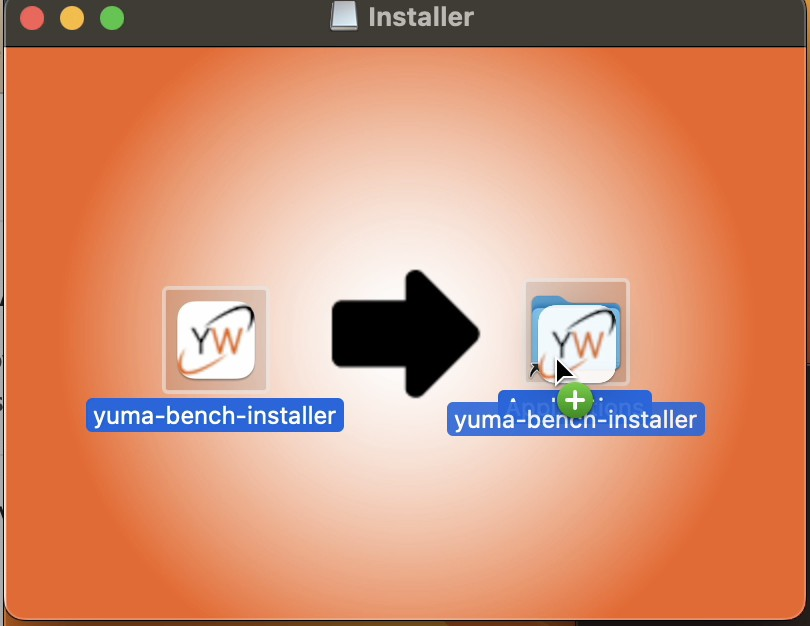
Drag yuma-bench-installer into the Applications folder.
Double-click yuma-bench-installer in Applications.
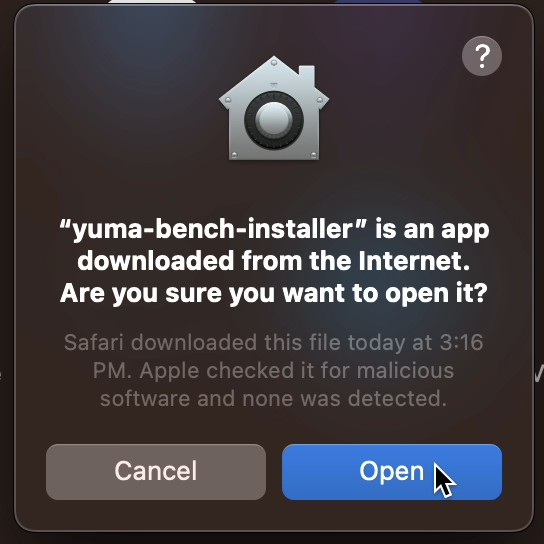
When macOS warns that the application was downloaded from the Internet, select Open.
Install macOS Dependencies
YumaBench requires Homebrew and openssl@3. If both are already installed, the installer continues automatically. Otherwise, it displays the command you need to run in Terminal.
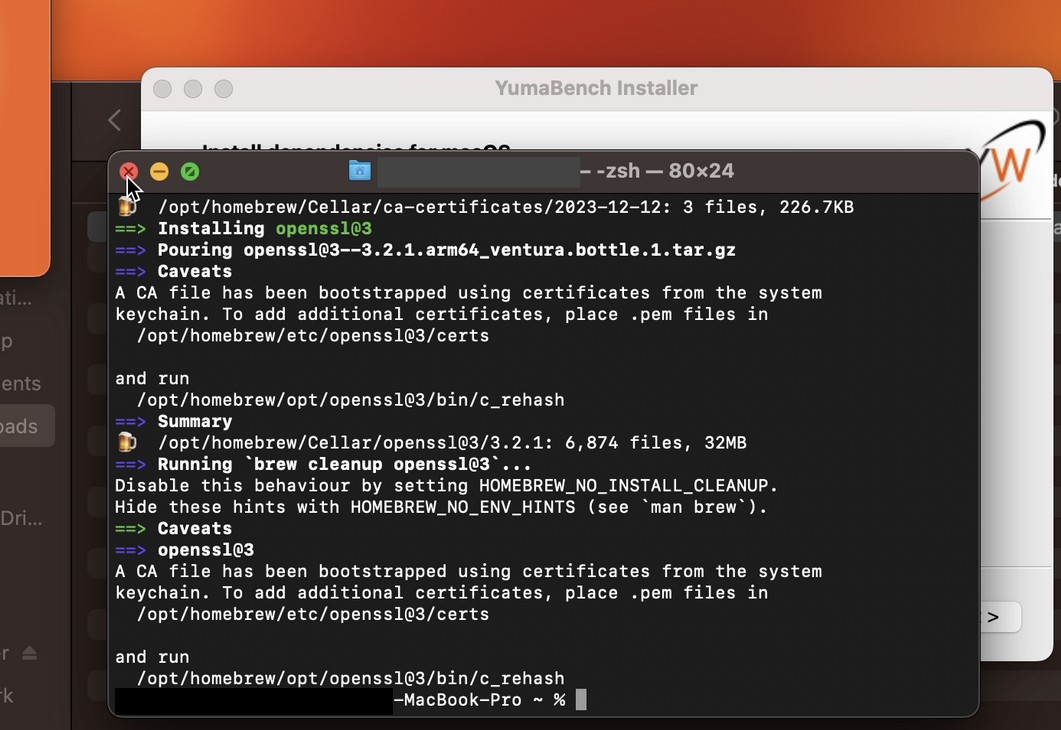
To install Homebrew:
$ /bin/bash -c "$(curl -fsSL https://raw.githubusercontent.com/Homebrew/install/HEAD/install.sh)"
On Apple silicon, Homebrew may instruct you to add it to your PATH. Replace
YOUR_USERNAME with your macOS account name:
$ (echo; echo 'eval "$(/opt/homebrew/bin/brew shellenv)"') >> /Users/YOUR_USERNAME/.zprofile
$ eval "$(/opt/homebrew/bin/brew shellenv)"
To install OpenSSL 3:
$ brew install openssl@3
Finish the macOS Installation
Run yuma-bench-installer again after installing the dependencies.
Select Next on the Introduction screen.
Accept the license agreement and select Next.
Review the dependency list and select Next.
Enter your macOS password when prompted.
Wait for the installer to confirm completion.
Launch YumaBench from the Applications folder or run yuma-bench in
Terminal.
Install on Windows
Download
yuma-bench-installer.exe.Open the installer from the Downloads folder.
On the Introduction screen, select Next.
Accept or change the installation location, then select Next.
Select the check box beside yuma-bench, then select Next.
Accept the license agreement and select Next.
Accept or change the Start Menu shortcuts and select Next.
On Ready to Install, select Install.
When installation completes, select Finish.
Launch YumaBench on Windows
Use any of these methods:
Method |
Action |
|---|---|
Desktop |
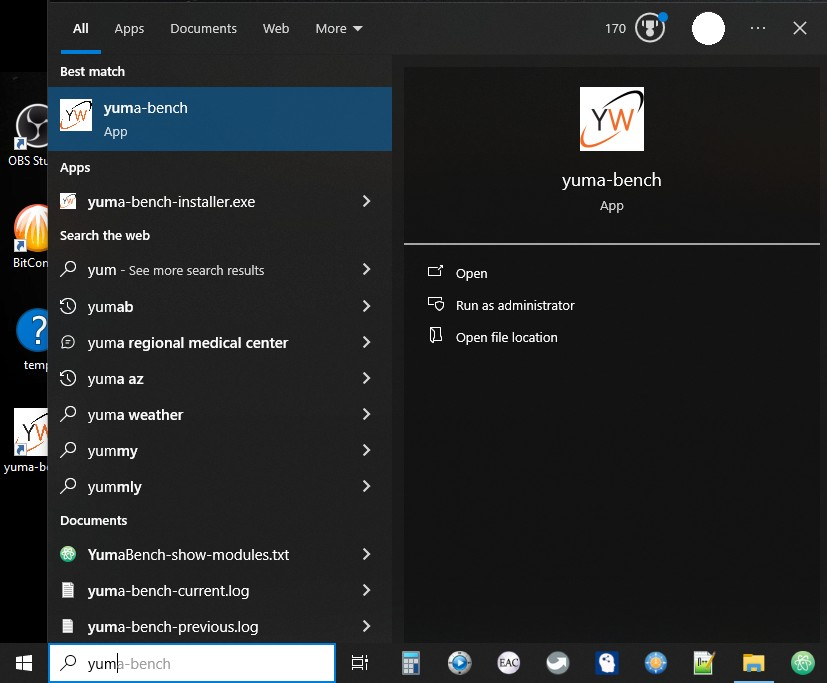
Double-click the YW yuma-bench desktop icon. |
Windows Search |
Type |
PowerShell or Command Prompt |
Run the executable by its full path, for example |
Add YumaBench to the Windows PATH
Adding the installation folder to PATH lets you run yuma-bench without
typing its full location.
Search Windows for
advancedand open View advanced system settings.In System Properties, select Environment Variables.
Under System variables, select Path, then select Edit.
Select New, then Browse.
Choose the YumaBench installation folder, such as
C:\YumaBench.Select OK in each open dialog.
Open a new PowerShell or Command Prompt window and run yuma-bench.
Installation Troubleshooting
Installer Reports an Exec Format Error
Message:
bash: ./yuma-bench-installer: cannot execute binary file: Exec format error
This usually means that the installer's CPU architecture does not match the system. Confirm that the system architecture matches the downloaded installer and use one of the supported operating systems listed in Choose Your Platform.
Installer Reports an Unsupported Operating System
If the installer displays a pop-up stating that the operating system is not supported, stop the installation and use one of the 64-bit operating systems listed in Choose Your Platform.
Required Yuma Modules Are Missing
If YumaBench displays a pop-up stating that required Yuma modules are missing, the installer may have been interrupted by a network connection error.
Confirm that the computer has a working Internet connection.
Close YumaBench.
Run the YumaBench installer again.
Start YumaBench after the installer completes successfully.
Other Common Problems
Problem |
Resolution |
|---|---|
Linux reports unavailable packages |
On CentOS or RHEL, enable EPEL and repeat the package installation. |
macOS installer stops for dependencies |
Install Homebrew and |
Windows cannot find |
Launch it by full path or add the YumaBench installation folder to |
Administrator access is unavailable |
Ask your system administrator to perform the installation. |
Next Steps
YumaBench is now ready to use. Consult the YumaBench User Manual for help connecting to a NETCONF server and using YumaBench features.